Navigation
- FAQ Home
- All categories
- Account
- Adding/Editing Content on your Website
- Billing
- Blog
- Calendar Feature
- Contact Form
- Design and Custom Graphics
- Domains
- Downloadable Files (PDF/Word Docs)
- Email Accounts
- Google Search Console
- Google/Yahoo Maps
- Hyperlinks
- Logo
- Media Library
- Music Files
- Navigation Pages
- Password Protected Pages
- Paypal
- Photos
- RSS Feeds
- Search Engine Optimization
- Side Banners
- Site Statistics
- Social Networking
- Videos (YouTube/Google Videos)
- Widgets/Affiliates and HTML
- Basic Computer Skills
- Instant Response
- Sitemap
0 Guests and 0 Registered
Records in this category
- I want to separate my blog entries by topic. How can I organize my blog entries by category?
- Ive added the Blog feature to my website. How do I get started blogging?
- I would like to add a blog entry to a category. How do I do that?
- How do I or turn on, or turn off, the blog comment feature?
- I would like to add a news feed of my most recent blog posts to my side banner. How do I create that?
- How do I add a new blog entry?
- How do I add a photo to a Blog entry (to an existing entry)?
- How do I add a Photo Slideshow/Gallery to my blog entry?
- How do I add a YouTube Video to a blog entry?
- How do I add a Video file to a Blog Entry?
- How do I change the order of my blog entries?
- How do I add a caption to a photo I have already added to a blog entry?
Tags
Sticky FAQs
- How do I change my password?
- How do I update my billing address?
- How do I change the contact information that appears ...
- I would like a custom design for my website. ...
- How do I change my domain name?
- I purchased my domain through my own registrant service ...
- I have just gotten a brand new email account ...
- I forgot my password to my email account. How ...
- How do I add a Map to a page ...
- How do I add a link to another website ...
- How do I upload my logo to my website? ...
- How do I add a new Navigation page to ...
- How do I change the order of my Web ...
- How do I add Photos to my Web page? ...
- What are Search Engine Meta Titles, Keywords and Descriptions ...
- How do I add text to a web page? ...
- How do I setup my new email address to ...
- How do I receive email from my website to ...
- How do I update my credit card (or ACH ...
- How do I get an email account for my ...
- How do I get First Page Placement in the ...
- The Calendar feature has been added to my website. ...
- I have forgotten my password to log into my ...
- How do I change my username for logging into ...
- What are the benefits and features of the Password ...
- How do I upload multiple photos at a time ...
Blog
How do I add a phototo a Blog entry (to an existing entry)?
To add a phototo a blog entry follow these steps (for steps with screenshots, scroll down):
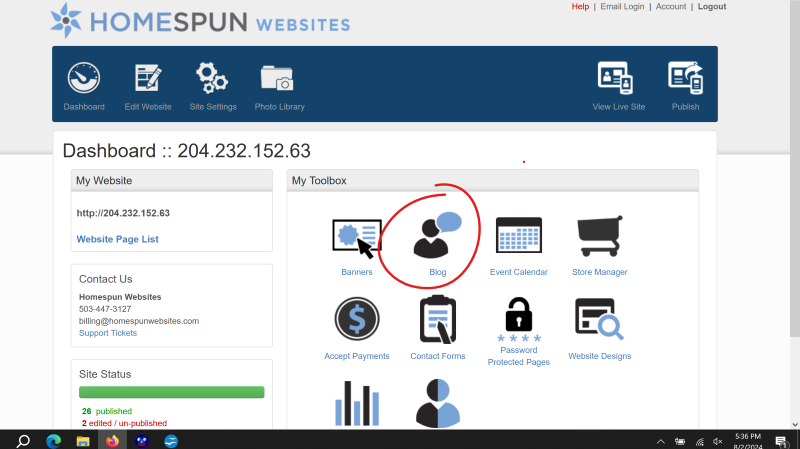
1. From your Dashboard, select "Blog."
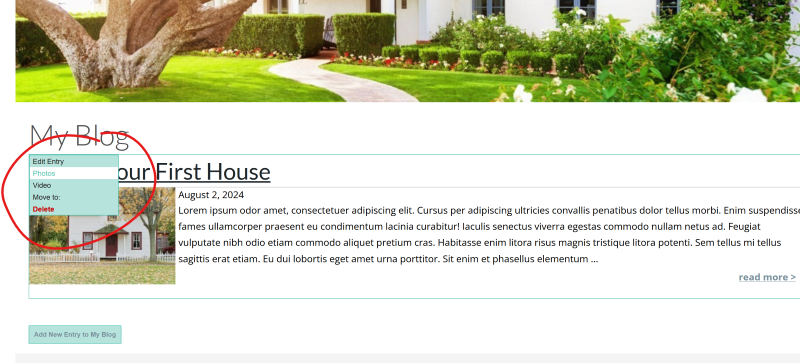
2. Hover
over the title of the Blog entry you would like to add a phototo. An
aqua-colored box will appear. Select "Photos" from this box.
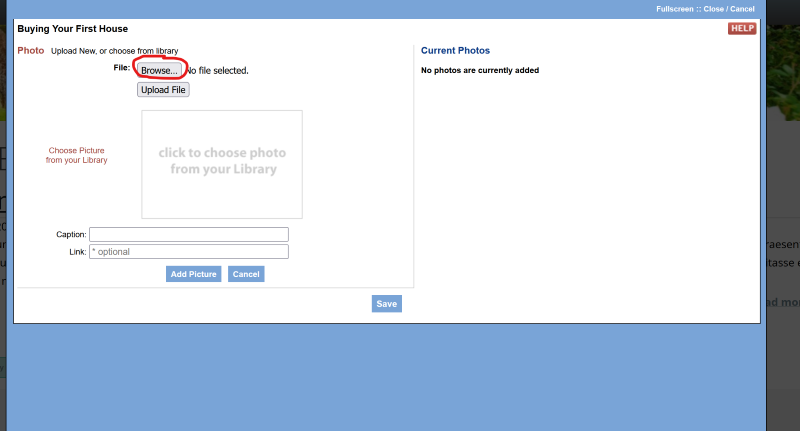
3. Click the "Browse" button.
4. The photofiles on your computer/device should appear. Double click on the file name of the photoyou are selecting (or click the file name once, then click "Open").
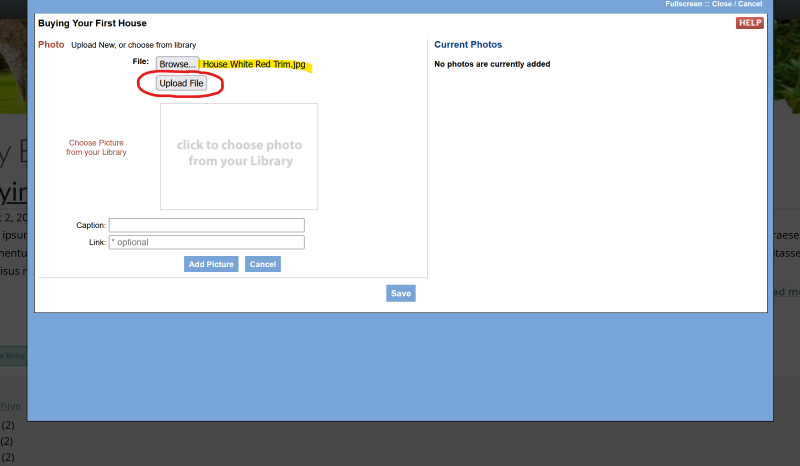
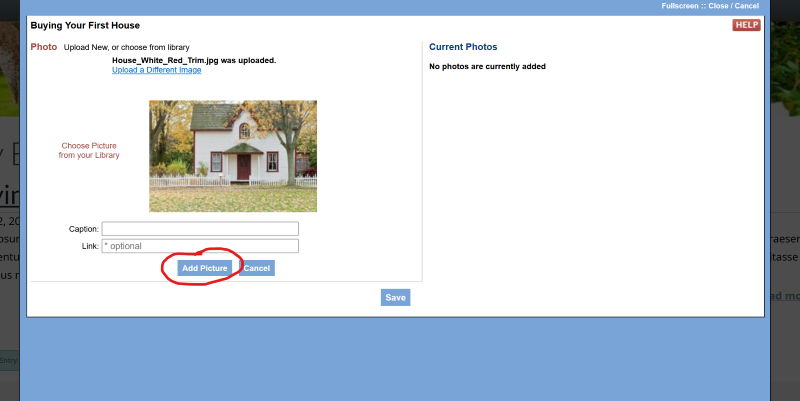
5. The name of the photofile selected should now appear next to the "Browse" button. Click the "Upload File" button below "Browse.".
6. Your picture should appear on the left side of editor. Click the "Add Picture" button.
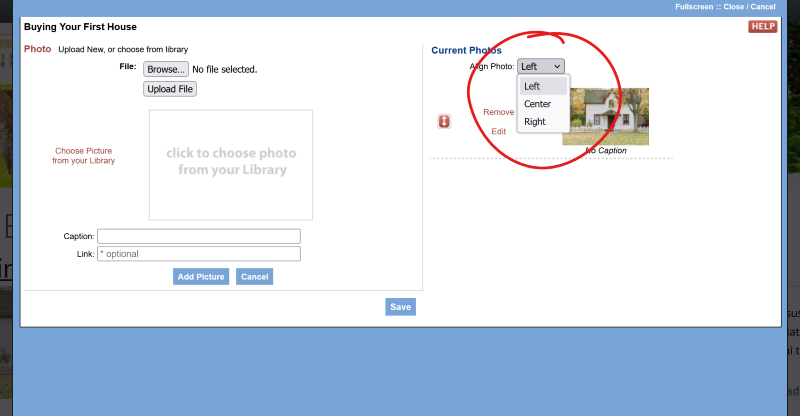
7. Your photoshould now appear on the right side of the editor. To chose placement of photo, click on the arrow next to where is says "Left." A drop-down menu will appear, Choose Left, Center, or Right.
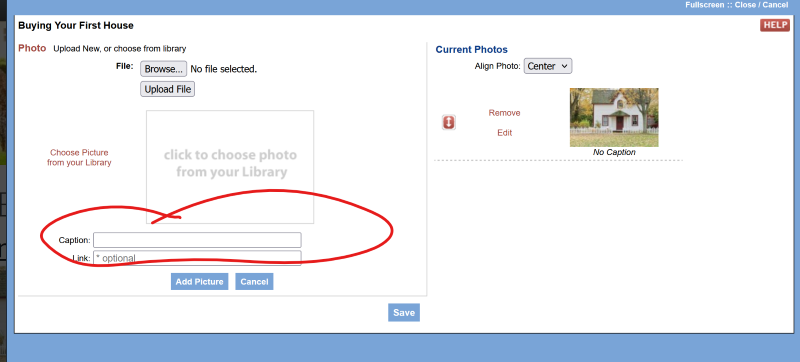
8. Add a caption (optional).
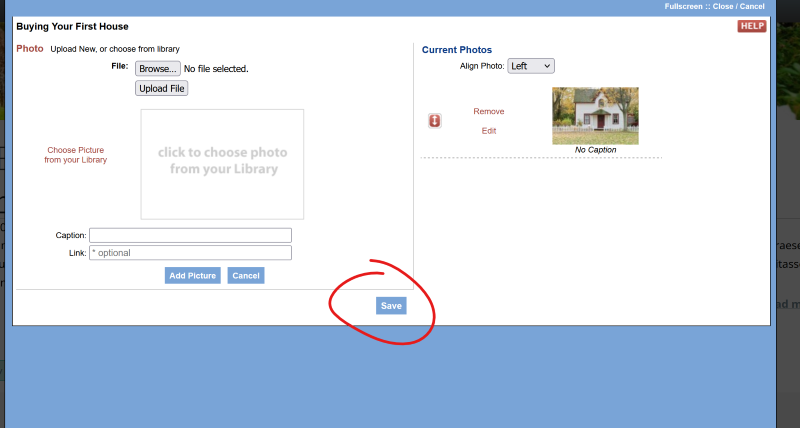
9. Click the "Save" button.
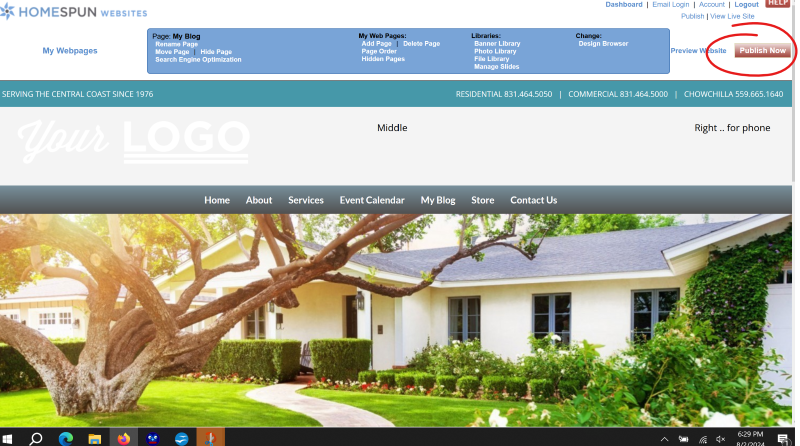
10. To make your change live, click the "Publish Now" button in the upper right corner of your screen.
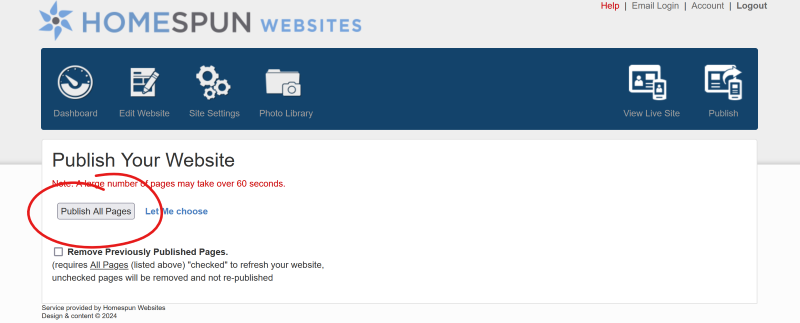
11. Select "Publish All Pages."
1. From your Dashboard, select "Blog."
2. Hover over the title of the Blog entry you would like to add a phototo. An aqua-colored box will appear. Select "Photos" from this box.
3. Click the "Browse" button.
4. The photofiles on your computer/device should appear. Double click on the file name of the photoyou are selecting (or click the file name once, then click "Open").
.png)
5. The name of the photofile selected should appear next to "Browse." Click the "Upload File" button.
6. Your picture should appear on the left side of editor. Click the "Add Picture" button.
7. Your photoshould now appear on the right side of the editor. To chose placement of photo, click on the arrow next to where is says "Left." A drop-down menu will appear, Choose Left, Center, or Right.
8. Add a caption (optional).
9. Click the "Save" button.
10. To make your change live, click the "Publish Now" button in the upper right corner of your screen.
11. Select "Publish All Pages."
Tags: Blog"
Related entries:
- How do I add a contact form to multiple pages within my website, not just on my contact us page?
- I would like to add my own Favicon to my site. How do I do that?
- I want to separate my blog entries by topic. How can I organize my blog entries by category?
- Ive added the Blog feature to my website. How do I get started blogging?
- How long are my files kept in a closed account before being deleted?
Last update: 2025-04-13 23:06
Author: WebBuilder Support
Revision: 1.4